If shallow roots in crops keep you on edge when a dry spell is due, you’re not alone. However, shallow rooting is usually diagnosable in minutes. In most fields, the main cause is a physical limit like compaction, capping, or smear. As a result, roots spread sideways, plants wilt earlier, and nutrient uptake becomes patchy.
Quick Answer
Shallow roots in crops usually come from a limiting layer that roots cannot push through. That layer is often compaction, capping, or drilling smear. Therefore, start with a spade test in a “good” area and a “bad” area, then measure rooting depth and the depth of the limiting layer before you change inputs.

Key Facts
Main symptom: Crops wilt early and recover slowly in dry spells.
Most common cause: A physical limit in the topsoil or subsoil (compaction, capping, smear).
Fastest check: Two spade holes (good vs bad) plus a simple structure score.
What to measure: Limiting layer depth, “80% rooting depth”, root branching, and wilting time.
Where biology fits: After you confirm the soil limit, use biology to support root reach and early P access as part of a programme.
Last updated: March 2026.
Shallow roots in crops – quick checks before you change inputs
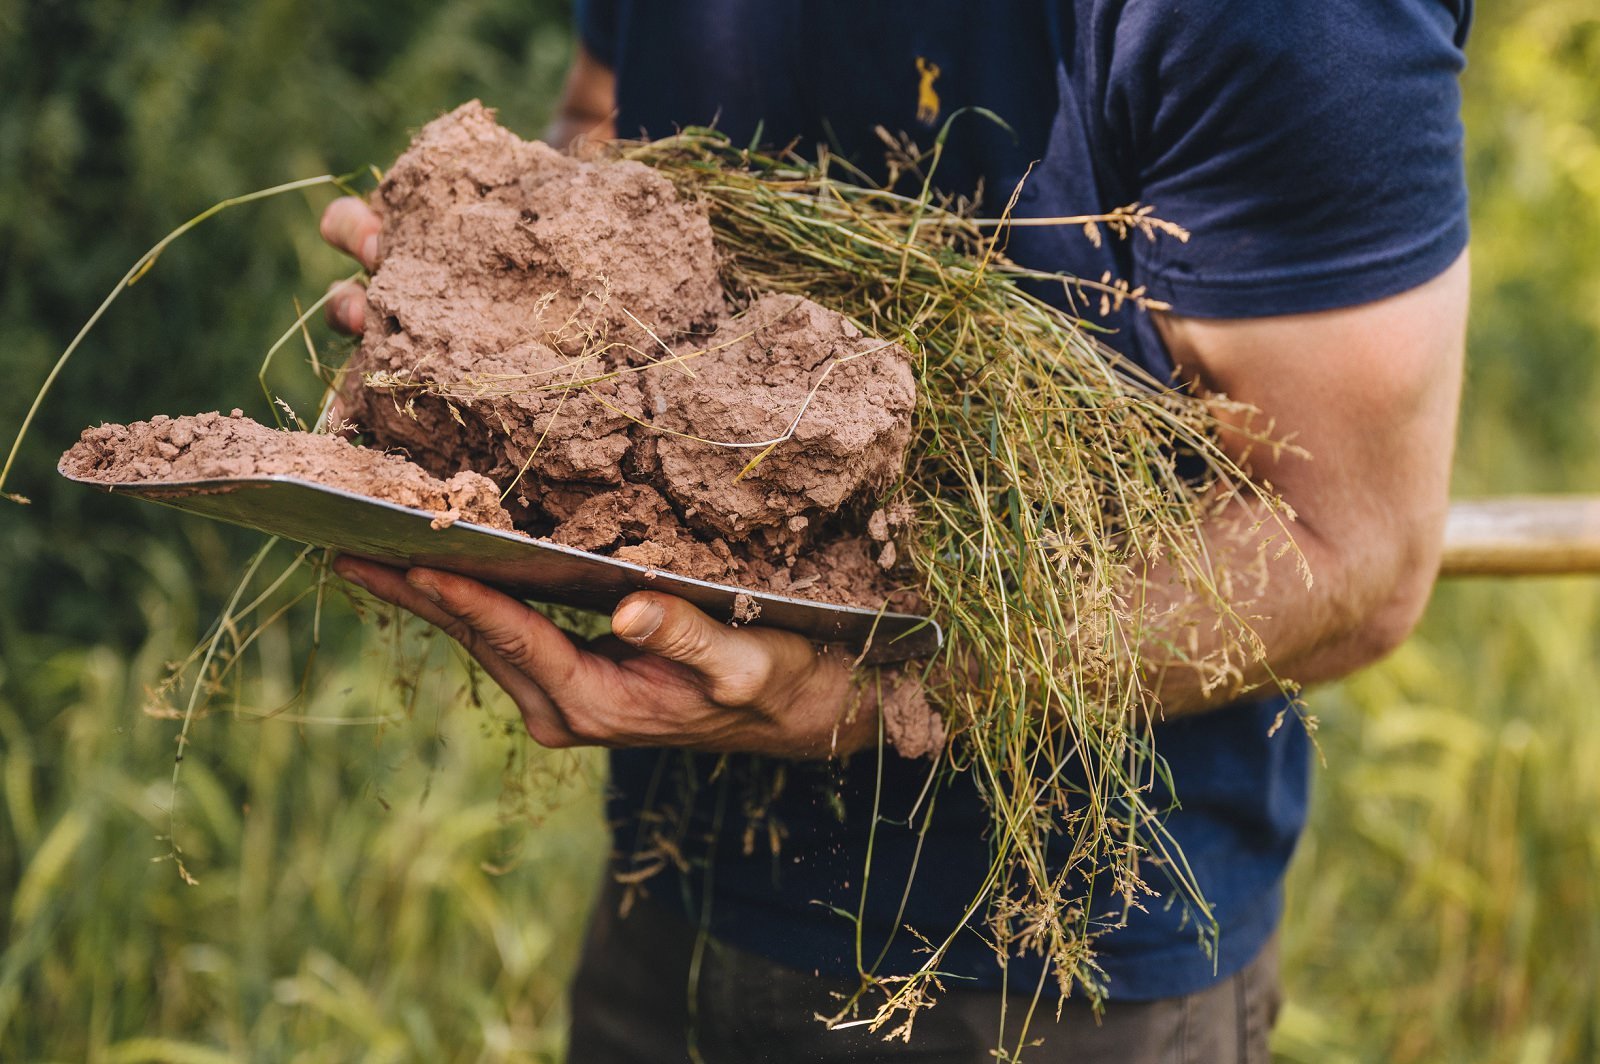
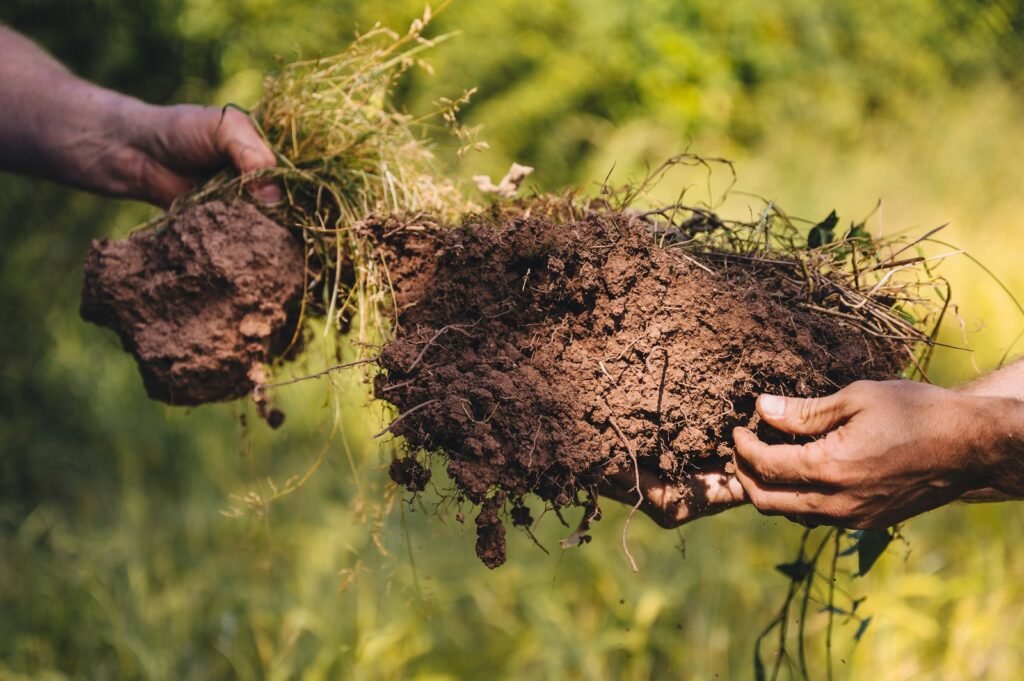
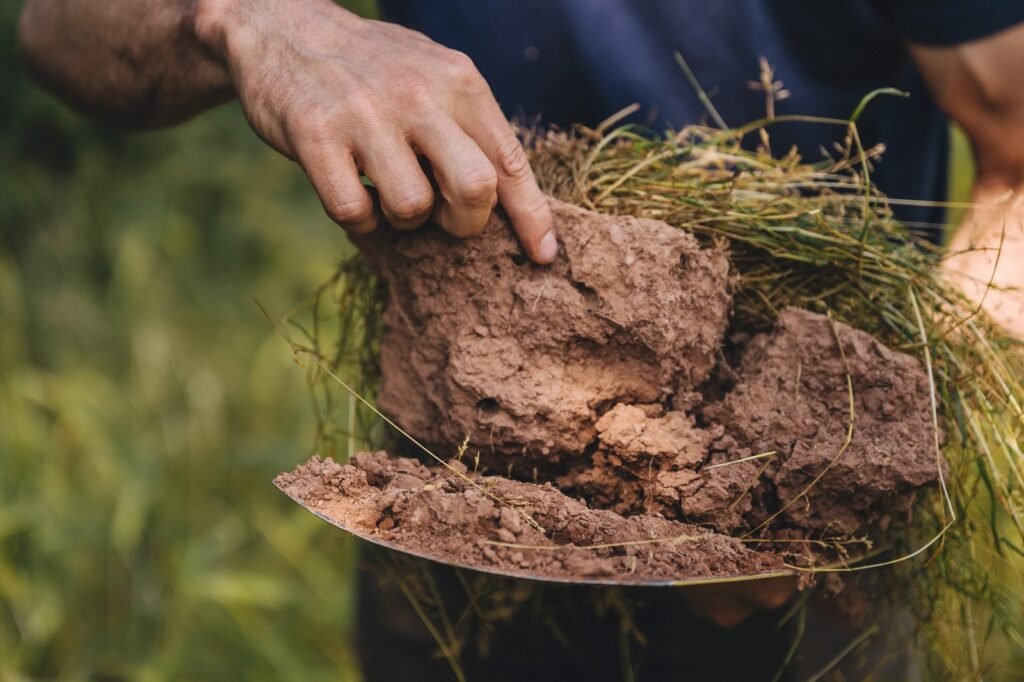
Before you add more inputs, check whether the soil is physically holding roots up. Start with two spade holes: one in a good patch and one where the crop flags first. Dig to 25–30 cm if you can. Then look for a limiting layer.
What to look for:
• Roots turning sideways at one depth = a barrier layer.
• A hard surface crust = capping.
• A smeared slot or “shiny” layer = drilling smear.
• Dense clods and few pores = poor structure.
Now score it quickly. Use a simple visual soil structure check (VESS-style). You don’t need to overthink it. You just need a repeatable score. Also record the depth of the worst layer, because that depth often predicts when wilting starts.
Finally, measure rooting depth in a farmer-proof way:
• Find the depth where about 80% of the roots sit.
• Ignore one or two deep “hero roots”.
• Write down the number (cm).
That number becomes your baseline. Therefore, you can prove improvement later.
Once you’ve confirmed the limiter, you can choose the right fix. Some fields need a mechanical reset first. Others need moisture timing and structure repair. After that, biological tools can help roots explore more soil and access early phosphorus.
Why shallow roots in crops happen (and what it costs you)
Shallow roots in crops rarely come from one thing. Most fields have a limiting layer plus a second factor that slows root branching. Therefore, the quickest win is to identify the main limiter first. Then you choose the right fix, instead of throwing inputs at symptoms.
Quick diagnosis table (match what you see to the likely cause)
| What you see | Likely cause | What to check |
|---|---|---|
| Roots turn sideways at one depth | Compaction pan or smeared layer | Dig to 25–30 cm and find the exact depth of the barrier |
| Surface crust and patchy stands | Capping / slumping | Check for a hard crust and shallow “mat” roots after rain then sun |
| Crop wilts by noon on light land | Shallow rooting + dry top layer | Check moisture at 10–20 cm and record “80% rooting depth” |
| Strong roots in one area, weak in another | Variable structure or traffic damage | Compare a good spot vs a bad spot (same field) |
| Plants look hungry even when fertiliser is on | Uptake limit, not supply | Check roots, moisture at depth, and compaction before adding more units |
| Poor rooting after drilling | Smear, slotting, or tight seedbed | Check for shiny smear and poor pore space around the slot |
| Roots brown or sparse in wet zones | Waterlogging or root disease pressure | Check smell/colour, rooting in wet patches, and drainage indicators |
The main causes (in the order you should check)
- Soil structure and compaction
Compaction reduces pores. As a result, roots hit a wall and spread sideways. You often see it in wheelings, headlands, and tight seedbeds. If you do nothing, drought stress arrives earlier because roots cannot reach deeper moisture. - Capping and slumping
A surface crust can block gas exchange and slow early rooting. Then seedlings stay shallow. Later, the crop wilts fast because it never built depth. - Drilling smear and slotting
Smear creates a shiny barrier around the seed zone. Therefore, roots struggle to leave the slot. The crop can look fine early, then fall behind when conditions dry. - Moisture extremes
Wet soils can kill fine roots. Dry soils then stop regrowth. Consequently, the crop runs in stop–start mode and never builds a strong root network. - Early phosphorus access
When young plants cannot access enough P, root branching slows. That limits exploration early. Then drought risk rises later because the crop never built the engine. - Biology and root exploration
Low fungal and microbial activity can reduce root exploration and resilience. In addition, crops may struggle more under stress swings. - Pests and disease
Some pests and root diseases reduce root function. Therefore, you see shallow, weak roots even where structure looks “okay”. If you suspect this, check affected plants closely and use your agronomist’s diagnosis tools.
What happens if you ignore shallow roots in crops
- Crops wilt earlier and recover slower in dry spells.
- Nutrient uptake turns patchy, so response becomes less reliable.
- Growth stages spread out, therefore spray timings get messy.
- You do more “firefighting” passes and spend more time reworking plans.
- Yield drag often shows up at harvest, especially on light soils.
The fix: remove the limiter, then extend the root system
Shallow roots in crops improve fastest when you fix the physical limiter first. Therefore, start with structure, capping, and drilling issues. Once roots can move, biological tools help crops explore more soil and access early phosphorus.
Step 1 – Remove the main limiter (what to do first)
Use your spade checks and the diagnosis table to pick the right action.
If you find compaction or a pan
• Target the layer at the depth you measured.
• Reduce unnecessary passes and traffic in wet conditions.
• Build conditions for roots: better pore space, less smear, more oxygen.
• If you need a mechanical reset, do it once. Then protect the gain with management.
If you find capping or slumping
• Improve surface condition: avoid over-working fine seedbeds.
• Aim for better aggregate stability and residue cover where practical.
• Time drilling and rolling to reduce crust risk.
• Watch headlands and light patches first.
If you find drilling smear or slotting
• Adjust drilling conditions and depth so you avoid shiny sidewalls.
• Recheck after drilling in good and bad zones.
• Focus on seed-to-soil contact without creating a sealed slot.
Step 2 – Extend root reach with biology (two levers that work together)
Once the soil lets roots move, two biological levers can support deeper rooting.
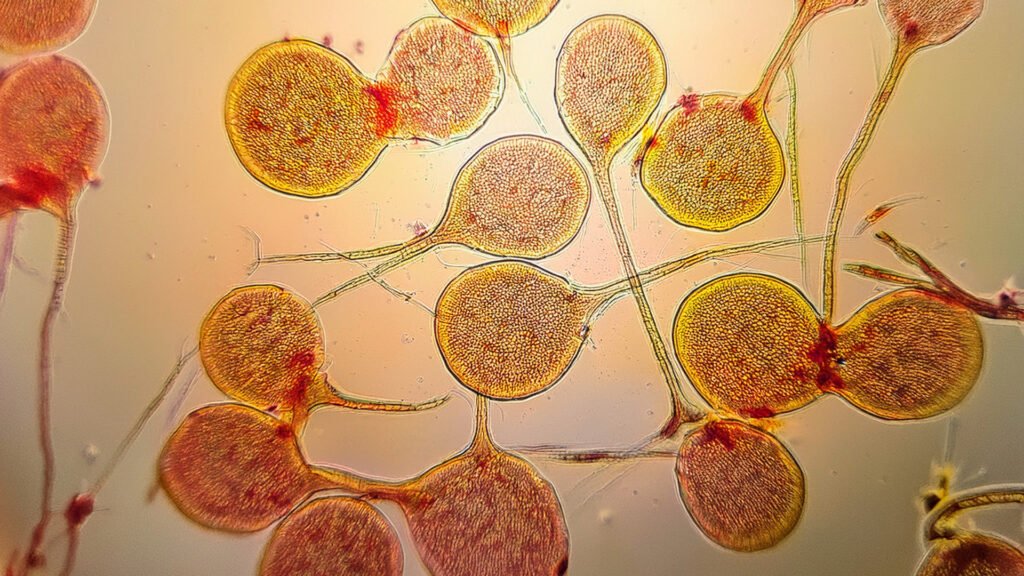
- Mycorrhiza for “extra reach” (RHIZO FORTE)
Mycorrhizal fungi form hyphae that act like ultra-fine root extensions. As a result, they can help roots access water and phosphorus beyond the root hair zone. This is most useful when the top layer dries and the crop needs extra reach. - P mobilisation for early root energy (BACTOFOS)
Early root branching needs energy, and phosphorus often limits that early. BactoFos supports mobilisation of soil phosphorus near the root zone. Therefore, plants get a better chance to build deeper, hairier roots during establishment.
What this looks like on farm
• Deeper rooting and more laterals on the first spade comparison.
• Wilting delayed on bright, dry afternoons versus an untreated strip.
• More even growth across light patches, so timings stay cleaner.
Run a strip or block trial on your driest field. Then compare rooting depth, wilting time, and early tissue P against an untreated strip. Keep what works and scale it next season.
Simple programme (establish → support → verify)
Use this programme when shallow roots in crops show up first on light land, banks, or tight headlands. Keep it simple. Timing and placement matter more than complexity.
1) Establish mycorrhiza at or near drilling
Rhizo Forte works best when it meets the young root early. Therefore, apply it at establishment as your label directs.
Do
• Place it close to the seed/young root zone where possible.
• Keep soil conditions workable, so roots can explore.
• Check seed treatment compatibility in advance.
Don’t
• Apply close to bactericides or harsh oxidisers.
• Assume mycorrhiza will “fix” a hard pan on its own.
2) Free early P near the root zone
Pair BactoFos at or around establishment to mobilise phosphorus where roots can actually use it. As a result, the crop has more energy for early root branching and canopy momentum.
Do
• Time passes when some soil moisture is present. Activity starts faster.
• Keep tank water and conditions sensible for biology.
• Focus on early growth stages where P demand drives rooting.
Don’t
• Expect results if the field is bone dry for weeks.
• Hide structure problems with more fertiliser.
3) Verify with quick checks (the part that saves money)
Run a strip or block trial on your driest field. Then prove the change.
Check these first (2–6 weeks):
• Limiting layer depth (good vs bad patch).
• 80% rooting depth (cm).
• Number of laterals and fine hairs.
• Wilting time on bright afternoons (treated vs control).
• Early tissue P if you already do sampling.
Keep the trial simple. Therefore, the result stays clear. (Always follow product labels and safety data.)

What to expect (typical reports)
Most farms see changes in rooting first, then canopy behaviour. However, weather still controls the speed of the response. That is why the “measure it” section matters.
Typical reports include:
• Rooting depth increases and roots branch more within weeks.
• Crops stay greener for longer on bright, drying days.
• Wilting starts later in the afternoon versus an untreated strip.
• Early canopy evenness improves, therefore spray timings feel simpler.
• Less “firefighting” when the forecast turns against you.
A useful way to think about it: deeper roots buy you time. They help the crop bridge the gap between rain events, and they make nutrient uptake steadier when the top layer dries.
Measure it (turn “feel” into proof)
Shallow roots in crops are easy to misread. Therefore, measure a few simple things so decisions stay clear. You only need one treated strip and one control strip to learn a lot.
What to track (simple and repeatable)
Root digs (every 10–14 days)
• Limiting layer depth (cm) in a good patch and a bad patch.
• “80% rooting depth” (cm): the depth where most roots sit.
• Root branching: count laterals on a few plants.
• Fine root hairs: note presence/absence and overall “fuzziness”.
Wilting time (during bright, dry spells)
• Note the time the crop first flags in treated vs control.
• Note the time it recovers in the evening.
• Repeat on 2–3 similar days if possible.
Leaf and canopy checks
• Early tissue P/K if you already sample.
• Photos from fixed points (same angle each time).
• NDVI/drone stills if you have them.
Time and rework (the hidden cost)
• Extra passes and re-timed sprays when conditions go dry.
• Minutes lost “chasing growth stages”.
A simple field log (so it’s not a hassle)
Pick 5–10 fixed points and label them on your phone map. Then repeat the same checks each time. As a result, you build evidence quickly.
Field tips: do’s & don’ts
Do
• Drill into the best seedbed you can. Roots come first.
• Time biological passes around moisture events where possible.
• Keep compaction in check. Biology works best when structure is workable.
• Start on your driest block first, so payback is obvious.
• Use cover crops where practical to improve structure and root channels over time.
• Recheck rooting depth after big rain events, because structure can change fast.
Don’t
• Tank-mix with bactericides or strong oxidisers near biological passes.
• Expect biology to fix a hard pan on its own. Reset mechanically first, then maintain.
• Overwork fine seedbeds on light land. That can increase capping risk.
• Chase midday wilting with extra nitrogen. Fix root access to water first.
• Skip measurements. Proof earns confidence and protects budget.

The products behind this programme
- Rhizo Forte — mycorrhizal fungi that extend functional root reach for water and P, supporting establishment and drought resilience.
- BactoFos — biology that mobilises locked soil phosphorus, feeding early root growth and canopy momentum.
Compatibility & safety: Natural, non-GMO. Follow labels and safety data. Additionally, avoid close sequencing with bactericides and check seed-treatment compatibility.
Shallow Roots in Crops – FAQs
Will this replace irrigation?
No. However, deeper roots help crops use limited moisture better between rain or irrigations. That can delay wilting and reduce stress swings.
Heavy clay vs light sand – who gains most?
Both can gain, but for different reasons. Light soils benefit from extra reach to moisture. Heavy soils benefit when root exploration is limited by structure and poor phosphorus availability near roots.
How soon will I see a change?
Often within weeks in root digs and wilting delay. Subsequently, canopy steadiness shows as growth stages roll.
Can I combine with liquid fertiliser?
Often yes. Nevertheless, check pH and salts, and avoid bactericides in the same tank. When unsure, split the pass.
Does this help where phosphorus is locked up?
Yes. Phosphorus lock-up slows early growth. BactoFos helps mobilise P near roots, while Rhizo Forte helps roots reach more of it.
What if roots hit a hard pan?
Biology won’t break a hard pan. Therefore, reset mechanically first, then maintain with better traffic management and biological support.
How do I measure rooting depth properly?
Use a spade and record the depth where about 80% of roots sit. Also record the depth of the limiting layer, then compare treated vs control.
Should I add more nitrogen if the crop wilts early?
Not automatically. Early wilting often points to shallow roots and poor water access. Fix rooting and structure first, then feed for growth.
Can I use this approach in a dry spring?
Yes, but timing matters. Biology performs best when there is at least some soil moisture. Therefore, time passes around moisture events where possible.
Wrap-up: beat shallow roots in crops before the next dry spell
Shallow roots in crops are not a mystery. In most fields, a physical soil limit holds roots up. Therefore, start with spade checks, find the limiting layer, and fix the basics first. Then use biology to extend root reach and improve early phosphorus access. Finally, prove it with a treated strip versus a control strip. That is how you reduce wilting risk without throwing more inputs at the problem.
Ready to beat shallow roots in crops on your driest fields?
→ Get in touch: Contact BactoTech UK
→ Learn more: Rhizo Forte · BactoFos and also read more about SOIL COMPACTION IN FIELDS and PATCHY EMERGENCE IN CROPS
Editorial note: General guidance only. Always follow product labels and local regulations. Last updated: March 2026.